Facebook Ads Setup Guide
Connect your Facebook Ads account using Pixel ID and Access Token
Overview
Facebook Ads integration uses your Pixel ID and Access Token to send conversion events directly to Facebook's Conversions API. This provides more reliable tracking than browser-based pixels alone, ensuring your newsletter subscriber events are properly attributed to your ad campaigns.
Step-by-Step Instructions
1Access Facebook Business Manager
Start by logging into your Facebook Business account where your ad account is managed.
Open Facebook Business Manager2Select Events Manager
From your Business Manager dashboard, locate and click on "Events Manager" in the left navigation menu.
3Select Data Sources
In the Events Manager, click on "Data Sources" in the left navigation menu to access your pixel settings.
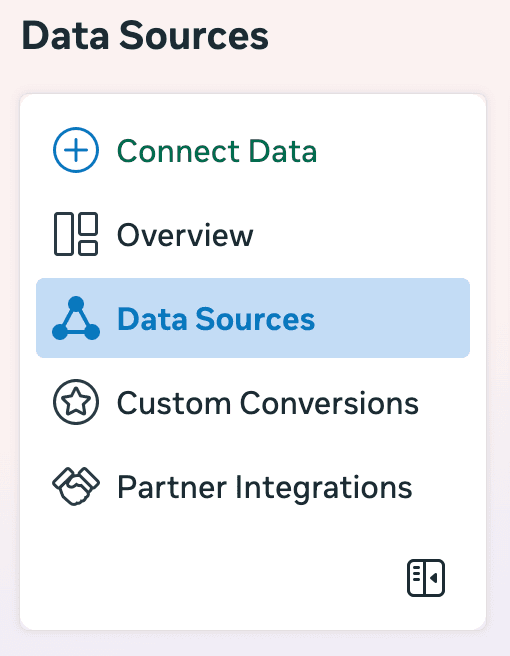
Facebook Events Manager showing Data Sources menu selection
4Access Pixel Settings
Find your Facebook Pixel in the Data Sources list and click on "Settings" in the top right corner, next to the "History" button. Take note of your Pixel ID - you'll need this for the setup.
- Pixel ID is visible in the settings page
- This ID is unique to your Facebook Pixel
5Generate Access Token
Scroll down in the settings page until you find the "Set up direct integration" section. Click the "Generate access token" button.
- Select "Set up with Dataset Quality API" (recommended)
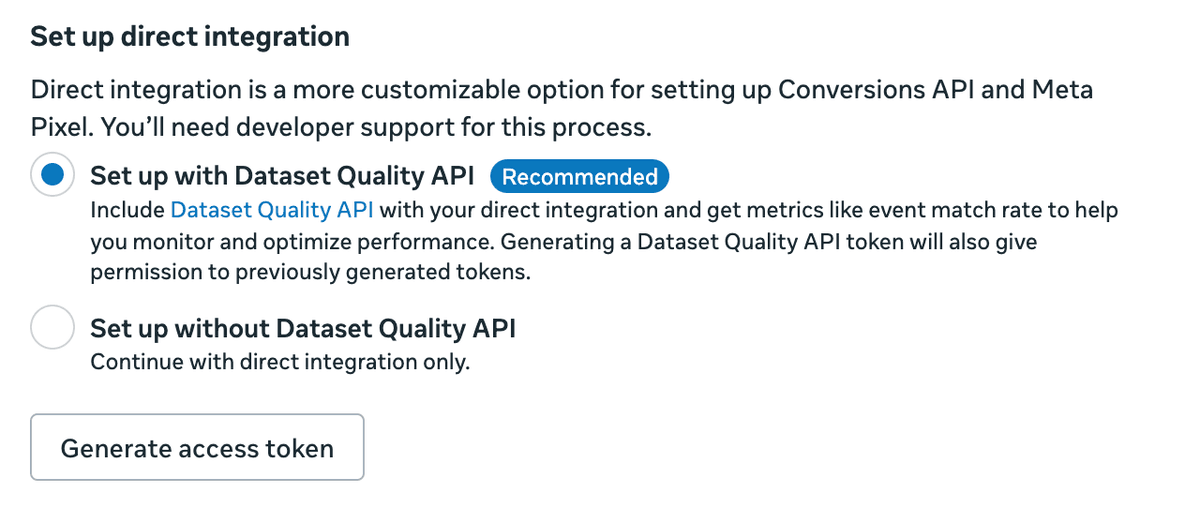
Facebook access token generation interface
6Select Dataset and Generate Token
Select your dataset from the dropdown menu and click "Generate access token". Facebook will create a new access token for your Conversions API integration.
- Token will be generated immediately
7Copy and Save Access Token
Once the access token is generated, copy it immediately and save it in a secure location. Facebook will not show this token again.
- Save both your Pixel ID and Access Token
✓Complete Setup in Our Platform
Now that you have both your Pixel ID and Access Token, you can complete the setup in our platform s new publication flow.
Start New Publication SetupNext Steps
Now that you have your Facebook credentials, you can:
- Enter your Pixel ID and Access Token in our platform
- Connect your newsletter platform (Kit, Beehiiv, or Self Hosted)
- Set up webhook events for conversion tracking
Troubleshooting
Can't find Events Manager?
Make sure you're logged into the correct Facebook Business account that has access to your ad account.
No Data Sources available?
You may need to create a Facebook Pixel first. Go to Data Sources and click "Add Data Source" to create a new pixel.
Access token not working?
Make sure you copied the complete token. If you lost it, you'll need to generate a new one from the same settings page.
Pixel ID not found?
The Pixel ID is displayed in the settings page. It's a series of numbers that uniquely identifies your Facebook Pixel.
Need to regenerate access token?
Go back to your pixel settings, scroll down to the access token section, and generate a new one. The old token will be invalidated.